


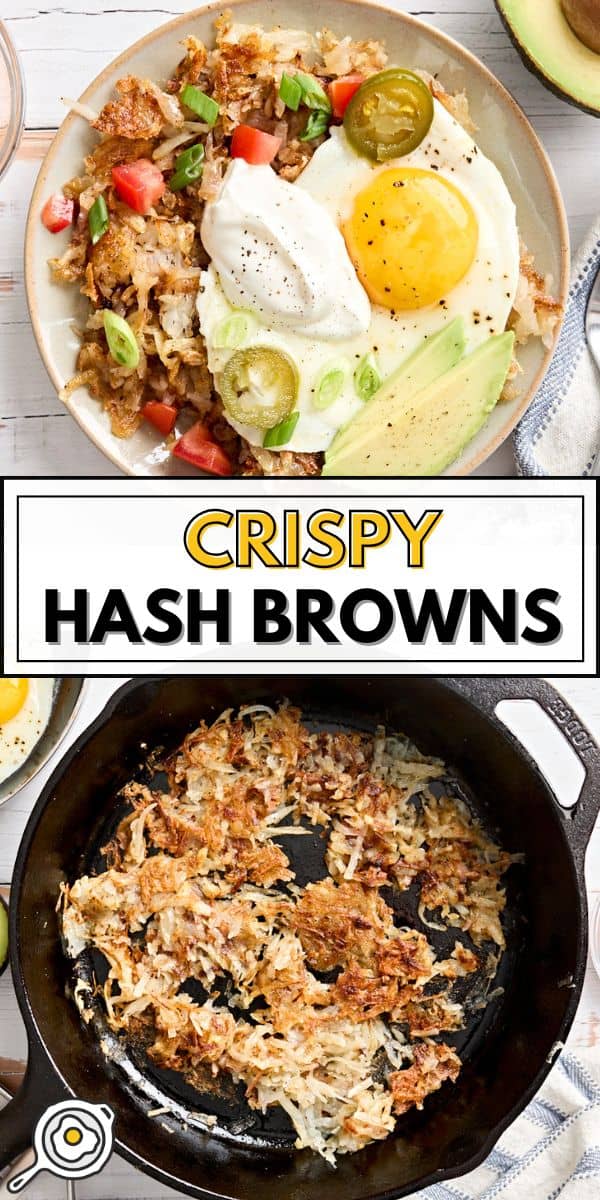
Potatoes are THE budget-friendly kitchen staple. They’re cheap and can be used in about a bazillion different ways. When I was asked for a tutorial on How to Make Crispy Hash Browns almost 9(!) years ago, I jumped on it. And all these years later, I still use this same method to get perfectly golden, crispy hash browns every time. I love making an indulgent breakfast on the weekends, and this recipe makes the perfect base for what I like to call my ultimate hash browns. Scroll to the bottom of the post to see what I topped them with to take them to the next level. 
All recipes are rigorously tested in our Nashville Test Kitchen to ensure they are easy, affordable, and delicious.
“Just made these with frozen hashbrowns. My husband took one bite and asked “Wow, what’s the secret to making them crispy?” I replied with “Beth.”
”
Erin
Easy Recipe for Crispy Hash Browns
Just like any breakfast potatoes, I’m sure everyone makes their hash browns differently. BUT, there are three things that I’ve found to be key to making really great golden brown hash browns: rinsing the starch off the potatoes, drying the potatoes well, and using an adequate amount of oil. Yes, that’s right, OIL! If you don’t use enough oil, the potatoes will dry and tend to go from white to burnt. Use enough, and you’ll get crispy yet moist potatoes with a beautiful spectrum of golden brown color.
This recipe only uses 3 simple ingredients (potatoes, oil, and seasoning salt), so each ingredient really matters! That’s why I like to keep things simple and focus on technique. And I’m happy to say this easy recipe has never failed me yet. 
Crispy Hash Browns Recipe
In just a few simple steps, you can learn How to Make Crispy Hash Browns at home. Follow my tricks to make them perfectly crisp and delicious!
Prevent your screen from going dark
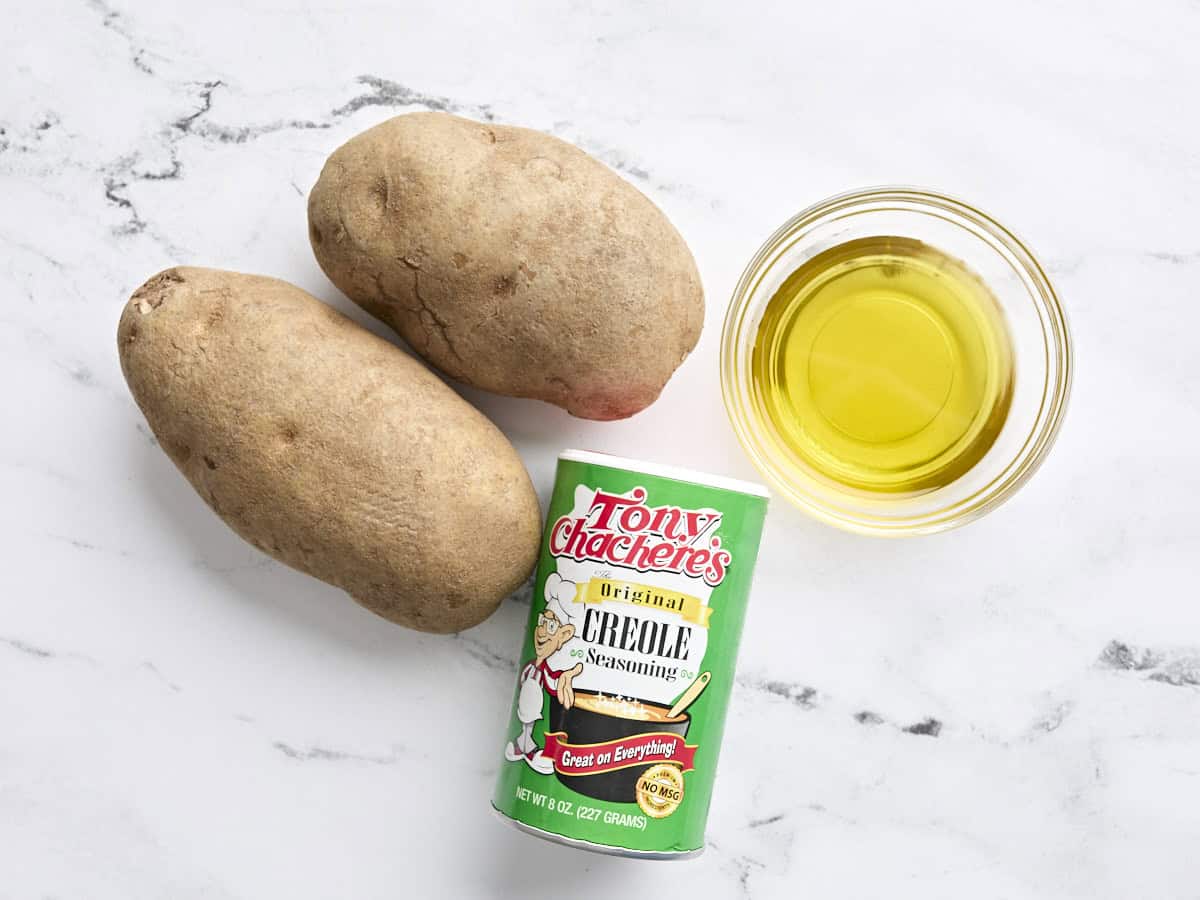
- 2 large russet potatoes (about 2 lbs.)* ($1.76)
- 4 Tbsp cooking oil, or as needed** ($0.16)
- Seasoning salt to taste ($0.05)
-
Peel the potatoes, if desired. Use a large-holed cheese grater or food processor to shred the potatoes. Place the potatoes in a colander and rinse well, or until the water runs clear. Let the potatoes drain.
-
Squeeze the potatoes of their excess water by pressing against the side of the colander or squeezing in your fist. Or, place the potatoes in a clean, lint-free dish towel, roll them up, then press to remove excess moisture.
-
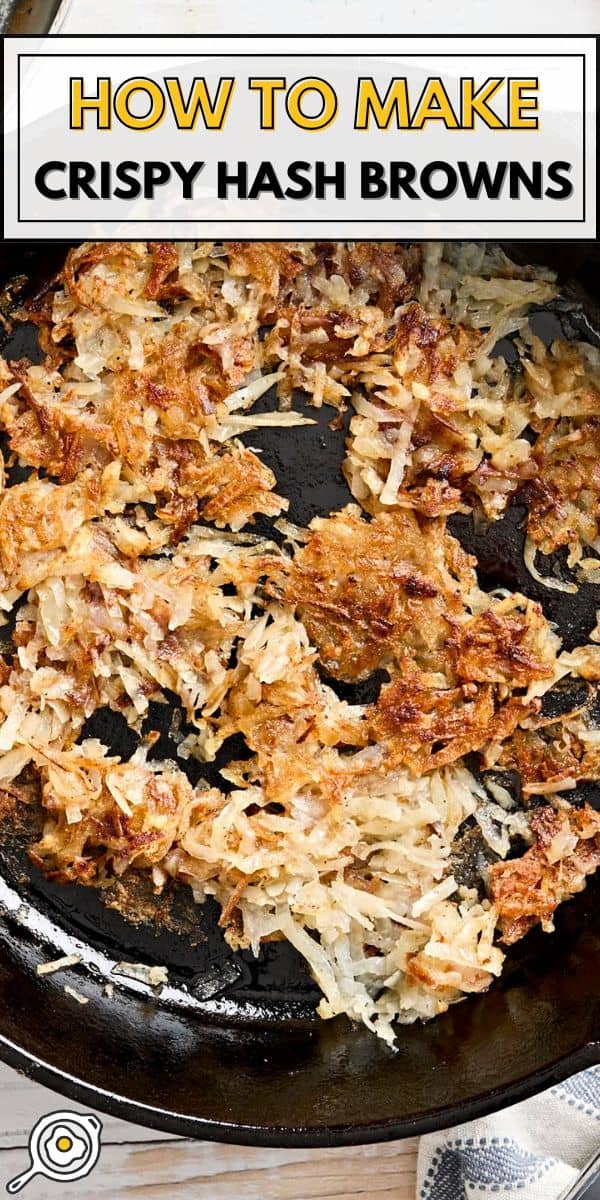
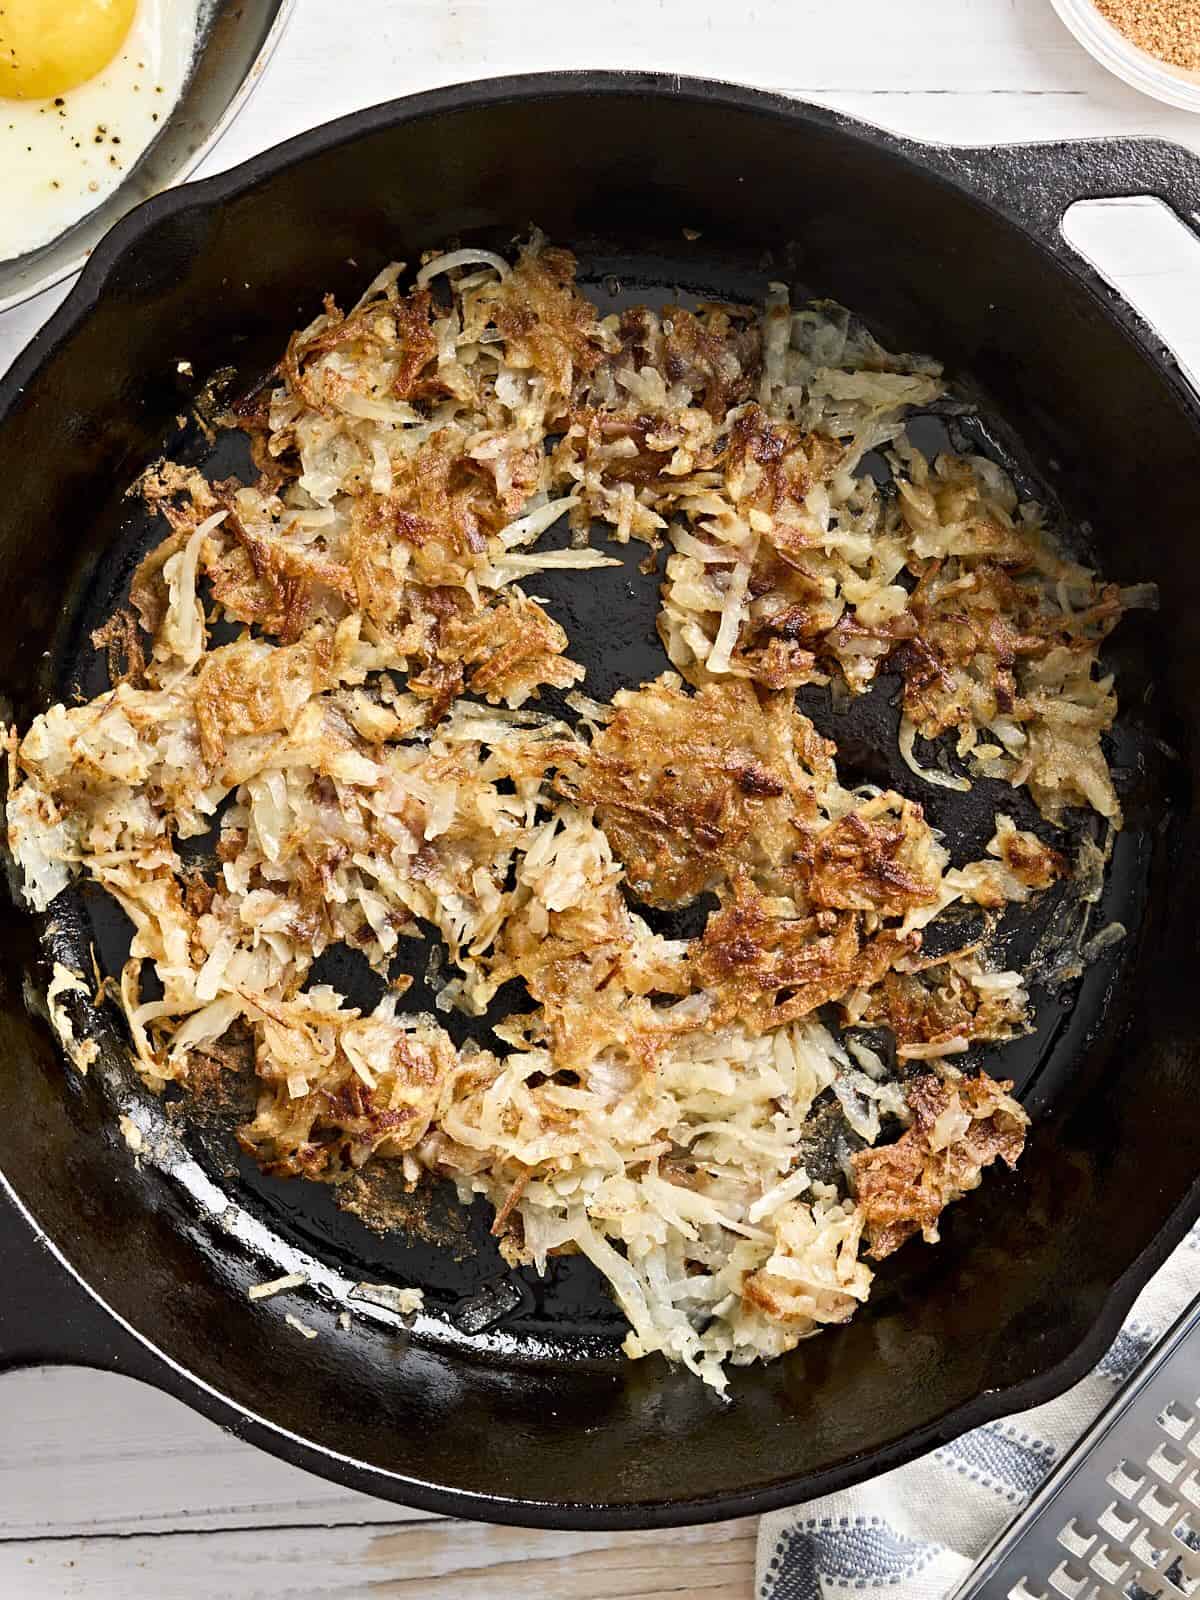
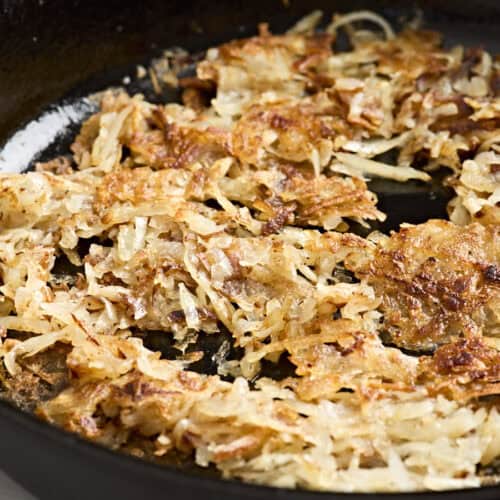
Heat a large cast iron or non-stick skillet over medium heat***. Once hot, add a tablespoon of cooking oil. Tilt the skillet to spread the oil over the surface. Add about 1/3 of the shredded potatoes or enough to cover the surface of the skillet in a solid, yet thin layer (1/2 inch thick or so). Let the potatoes fry, without disturbing, until deeply golden brown on the bottom (3-5 minutes). Season lightly with seasoning salt.
-
Flip the potatoes, and drizzle with additional oil if needed. Let the potatoes cook on the second side without disturbing until golden brown and crispy again. Season lightly on the second side.
-
If needed, flip and cook one more time to achieve the ratio of brown to white that you like. Repeat the process until all of the potatoes are cooked. Serve hot.
See how we calculate recipe costs here.
**You must use an oil with a high smoke point, like canola, corn, peanut, or sunflower oil. Butter obviously gives amazing flavor, but the butter solids tend to burn, so you’ll want to use clarified butter or ghee instead. I didn’t have the patience to clarify any butter, so I just used canola oil.
***I always use my 10″ cast iron skillet because it offers non-stick protection while giving really even heat and a nice surface for crisping. While stainless steel is also great for crisping, starchy foods (like potatoes) tend to stick a lot more on stainless, so it can be tricky. If you’re not well practiced with keeping food from sticking on stainless steel, I’d suggest either cast iron or a non-stick skillet.
Serving: 1servingCalories: 303kcalCarbohydrates: 41gProtein: 5gFat: 14gSodium: 157mgFiber: 3g
Read our full nutrition disclaimer here.
How to Make Hash Browns step-by-step photos
Clean the potatoes: Start with two russet potatoes (about 2 lbs). You can either scrub them clean and leave the skin on or peel them. Gather the other ingredients.
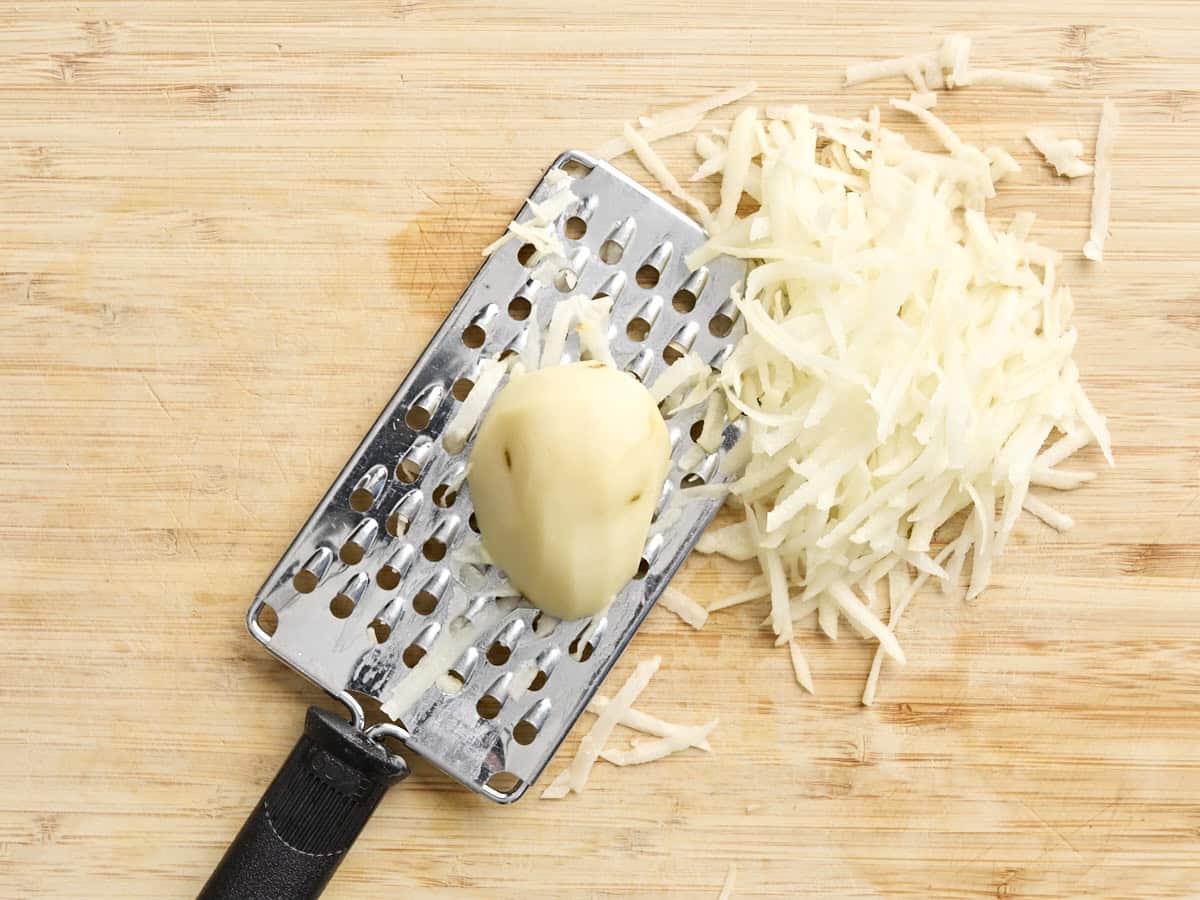
Shred the potatoes: Use a large-holed cheese grater or a food processor to shred the potatoes. I found that the potatoes shredded fairly easily with the cheese grater, so it wasn’t worth cleaning out the food processor.
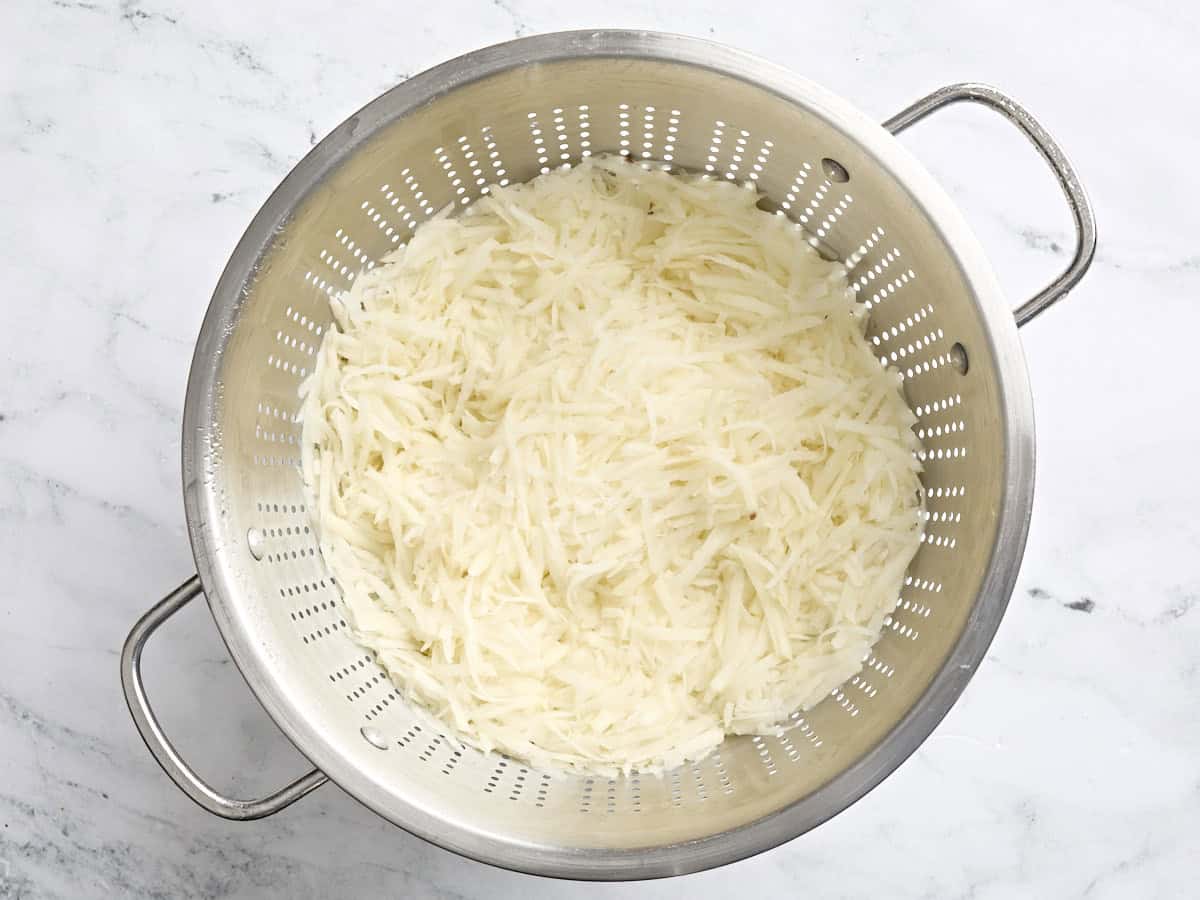
Rinse the shredded potatoes: Place the shredded potatoes in a colander and rinse them really, really, really well. The water running from the colander should be clear. Then, let them drain.
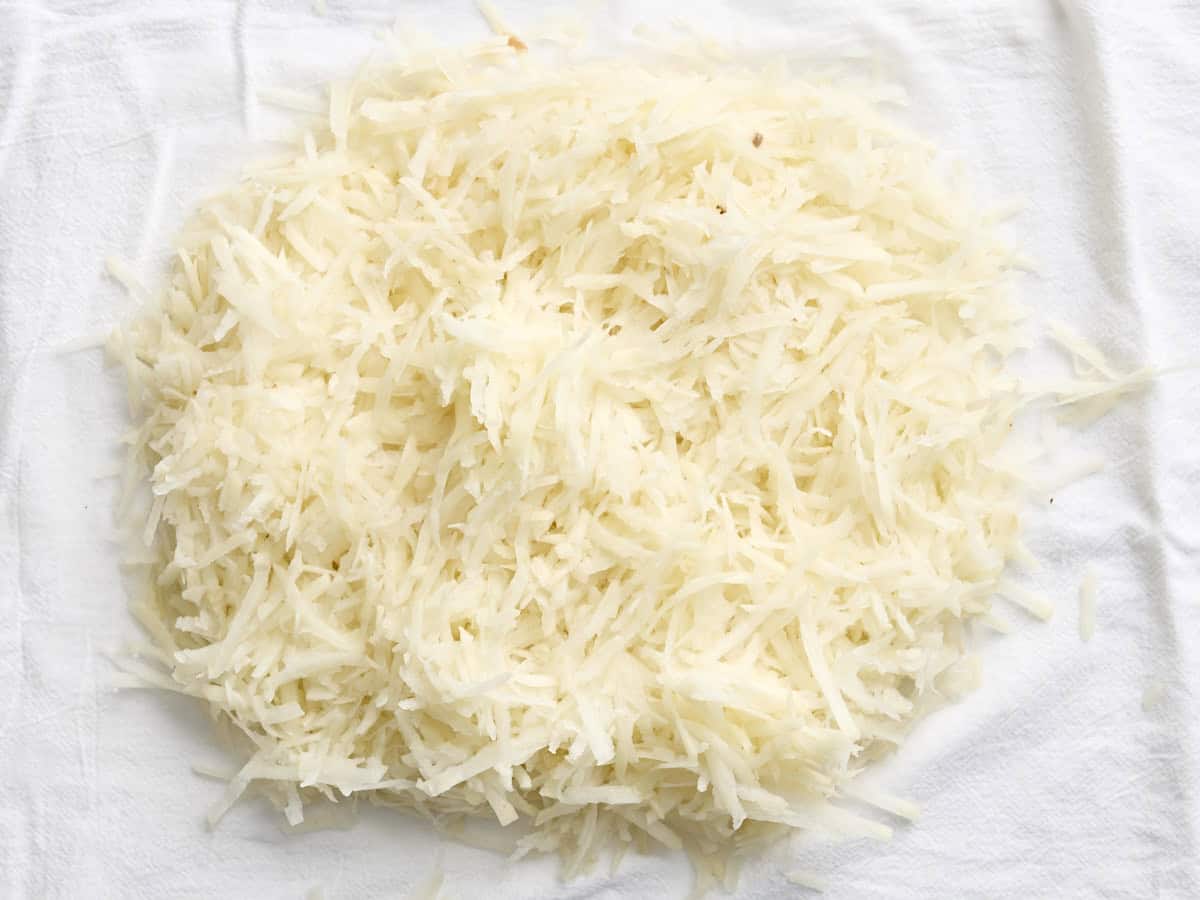
Dry the shredded potatoes: Making sure the potatoes are as dry as possible is my secret to keeping them crispy. If they have too much water on them, that water will turn to steam while they cook, which basically steams the potatoes and makes them soft. So, you can either let them drain a long time in the colander, squeeze them dry with your hands, or roll them up in a clean, lint-free towel and press them dry. I chose the towel method.
Make the hash browns: Heat a large cast iron or non-stick skillet over medium heat. Once it’s hot, add about a tablespoon of oil. Spread the oil over the surface of the skillet, then add about 1/3 of the shredded potatoes or enough to cover the bottom of the skillet in a solid but thin layer (only about 1/2 inch thick). You’re shooting for maximum surface contact here, so if they’re packed in there too thick, some won’t touch the skillet…and they’ll generate steam again and make everything mushy.
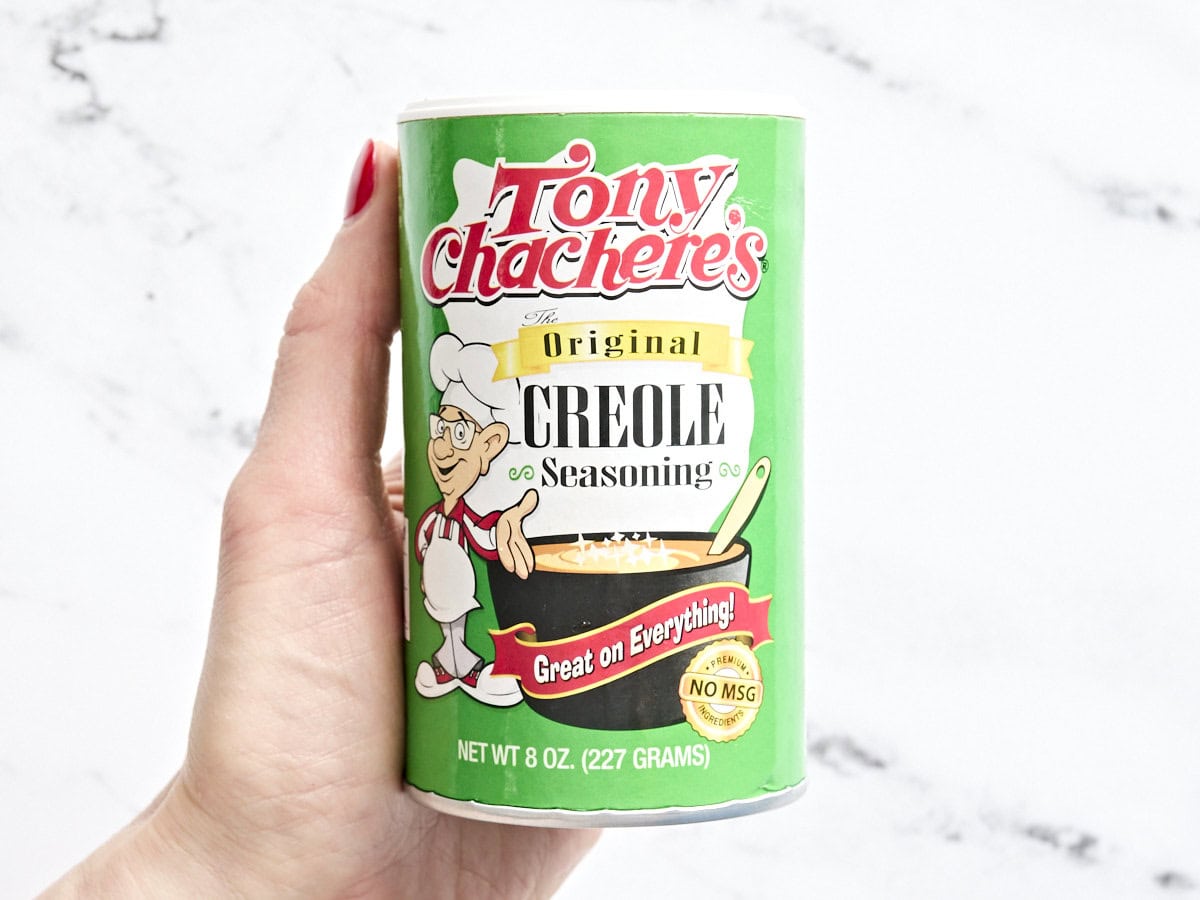
While the potatoes are cooking, sprinkle on a little seasoning salt. This is the kind I use, but you can use whatever brand you like. I love the little bit of extra flavor and kick that seasoning salt adds to the crispy hash browns compared to just plain salt and pepper.
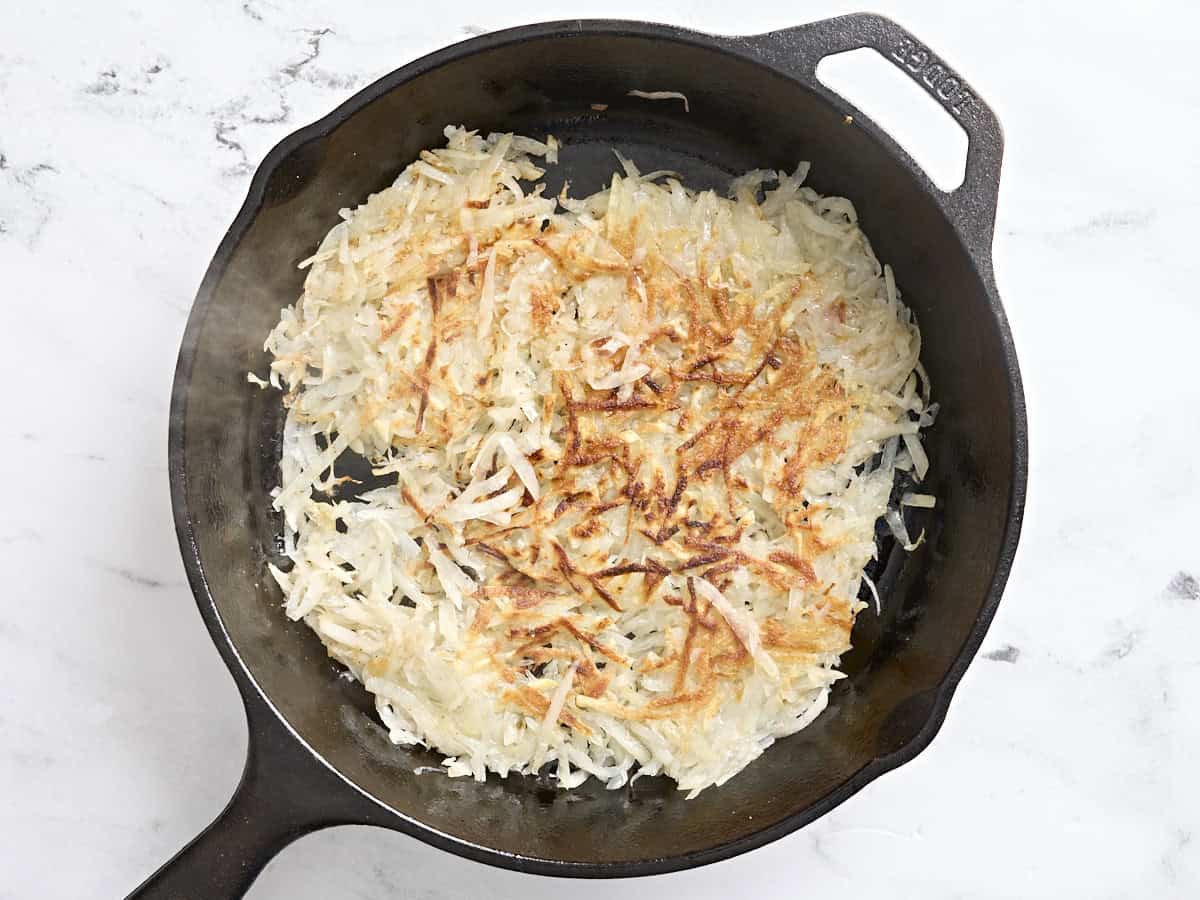
Now, the key here is to not touch them long enough for them to get really nice and brown and crispy. If you mess around with them, stirring or flipping too often, they won’t form a nice crust, and the long strands will kind of break down. So, LEAVE THEM BE.  Then, once they’re very golden, flip them. You might need to drizzle on a little more oil at this point to help the second side crisp up.
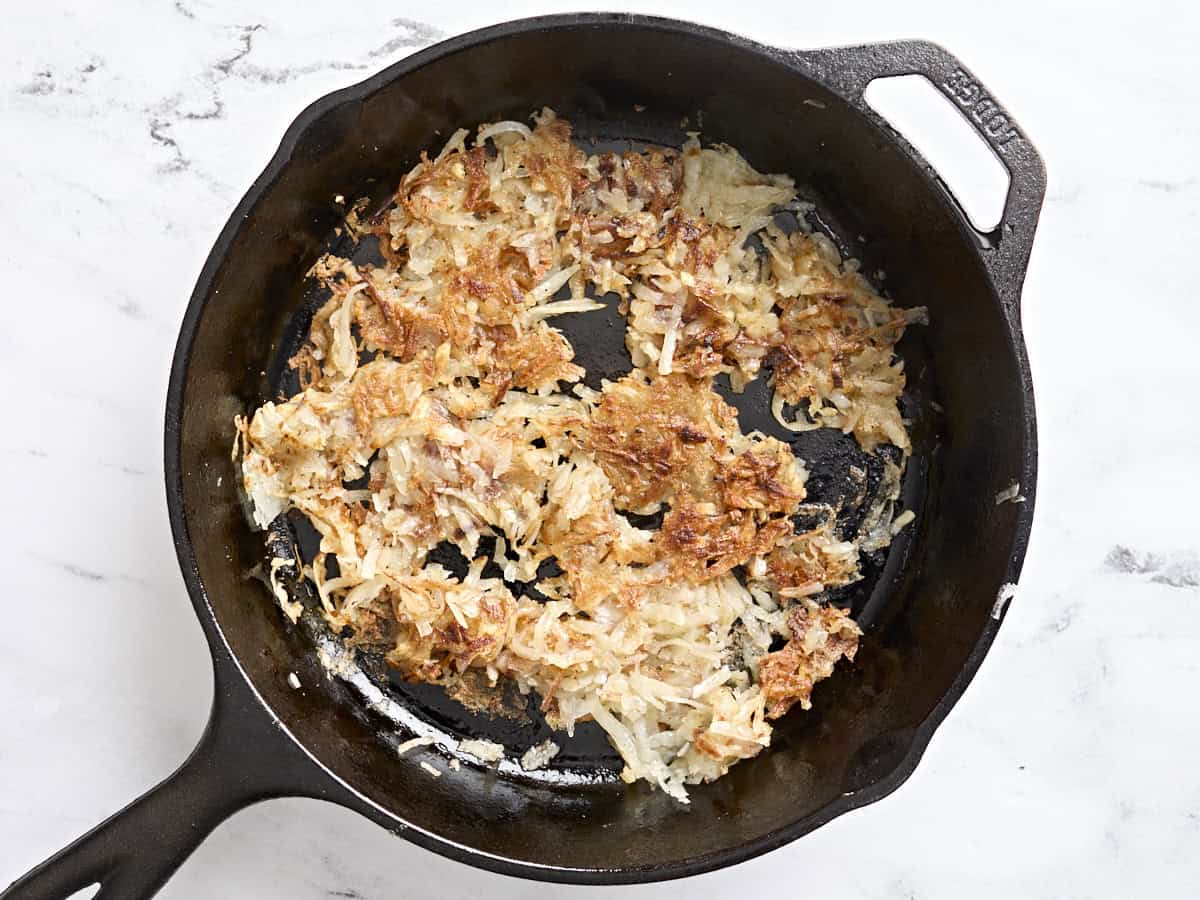
Then, LET THE SECOND SIDE BE until it’s also golden and crispy. Now, depending on how many potatoes you have in the skillet, you may want to flip and cook one last time to get most of the potatoes crispy, but that’s up to you. Some people like a 50/50 ratio of crispy to soft, some people like almost all crispy. Repeat the process a couple more times or until you’ve cooked all the potatoes.
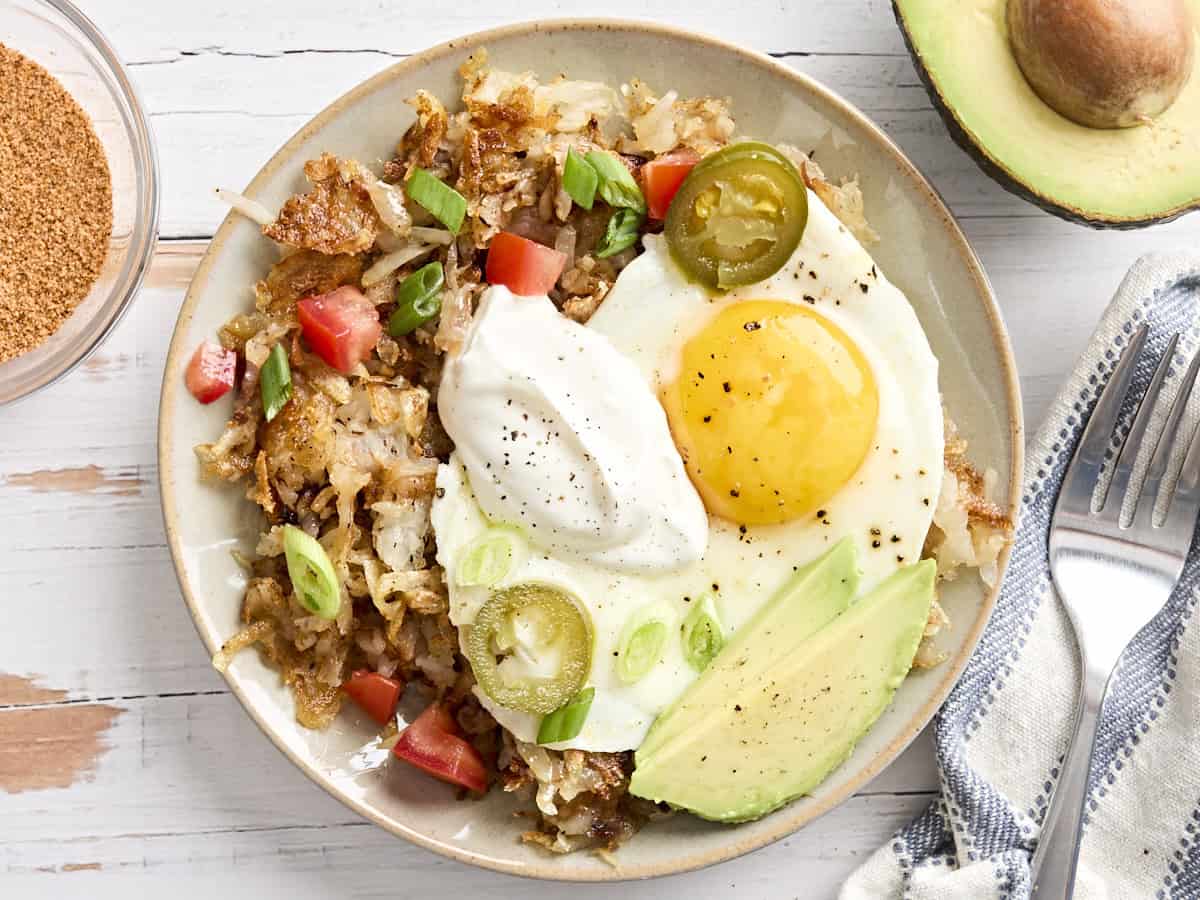
These crispy hash browns are great on their own and all, but why not make them ULTIMATE by adding lots of yummy toppings? I did a fried egg, some avocado slices, diced tomato, sliced jalapeño, green onion, and a dollop of sour cream. Waffle House ain’t got nuthin’ on my hash browns.
Serving Suggestions
On those days when I don’t want to add any toppings, I like to serve these homemade hash browns with something equally delicious to make it a complete breakfast! I love piling them up alongside candied bacon for the perfect sweet-and-savory combo. Air fryer hard-boiled eggs are also great because they’re hands-off and cook themselves while I tend to the potatoes! But if I’m feeding a crowd, I’d go for something like a frittata or sheet pan pancakes since they’re both easy to make and can serve a lot of people at once.
Storage & Reheating
Let your leftovers cool and store them in an airtight container in the fridge for up to 3 days. Reheat them in a skillet with a little oil or in the air fryer to crisp them back up again!
Our Crispy Hash Browns recipe was originally published 4/8/16. It was retested, reworked, and republished to be better than ever 3/20/25.


+ There are no comments
Add yours